
This blouse took a lot longer than my previous projects, partly due to spending all last weekend at our daughter’s dance show and partly because this was more complex than anything I have already made, so I took my time to make sure I got it right. 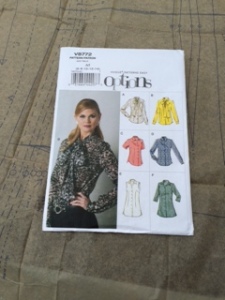 I used Vogue V8772. I really wanted to get a good fit with this blouse, so I carefully compared my measurements to those on the pattern. I made a bust adjustment to move the bust dart up one inch and I shortened the length of the bodice so I can wear it untucked or tucked in, depending upon what I am wearing it with. Other than that, it was as per the pattern. The construction of the bodice and the tie were both pretty simple and I made this up fairly quickly.

 I knew that the sleeves would be a bit more challenging. The first tricky bit was understanding what a ‘continuous lap’ is. I checked out a couple of really helpful videos that showed exactly how to attach it. It’s effectively a binding that goes around the slit at the cuff. Here’s a picture of the completed continuous lap.
  It’s difficult to see as it is in the same fabric. I managed to catch some fabric in the piece at the top of the slit, so had to unpick it and re-do that part just once, so not too bad for a first attempt and it looks fairly neat. The next tricky part was the cuff. It was easy enough to construct, but I must have measured incorrectly, so one of them did not have enough circumference to fasten! A quick unpick and re-cut and it was soon matching the other cuff. I got to the point where the entire blouse was constructed and I just had the button holes and buttons to finish. That was a bit scary as I could have ruined the whole project at this point! I have not attempted button holes for at least 20 years, so the discarded cuff came in as a great piece to practice them on. After around 10 practice attempts, ensuring that I had the length of the button hole just right to fit the button, I took a deep breath and went for it. Eleven button holes later, the blouse was almost complete. I finished sewing on the buttons and was able to wear it with my jeans to my Dad’s 70th birthday dinner. I’m really pleased with the finished project. As I took my time, it is nice and neat – even on the inside! It’s such a great feeling wearing something that you have made yourself. It’s so nice to have such a good fit and I’m really pleased with the fabric colour too – one of my favourite shades.


Here is the last button just being stitched on and the completed blouse. I’m off to make a skirt pattern now. It has been drafted by Kate of FabricKated, so I’ll report back on how that goes. You can see a glimpse of it here with my blouse – it’s not finished yet – I’ve got to add the lining, but couldn’t wait to try it on!

Pingback: Sewing: Experimenting with different fabrics | Lyn Bromley at First Impressions
Beautifully done!
Thank you very much! I am enjoying wearing it too.
I am amking a muslin if this and its a good fit. So far I have only had to adjust shoulders.
Pingback: Sewing: Curvy Pencil Skirt | Lyn Bromley at First Impressions
What a beautiful job you have done Lyn. Your alterations are fantastic and I can see that the bust dart is much better than on RTW. The colour is gorgeous and you have done yourself proud. I am really impressed. Looking forward to seeing the skirt!!
Thank you Kate!